David Bamberger recently posted an item on the Bamberger Ranch Journal showing photos of the water flows created by the rains brought by tropical storm Hermine on September 7th and 8th. I have at least two images in my files of areas pictured in David’s blog entry during the ranch’s last “wet year,” 2007. Bamberger Ranch Journal followers might find the contrast adds some perspective to David’s photos.
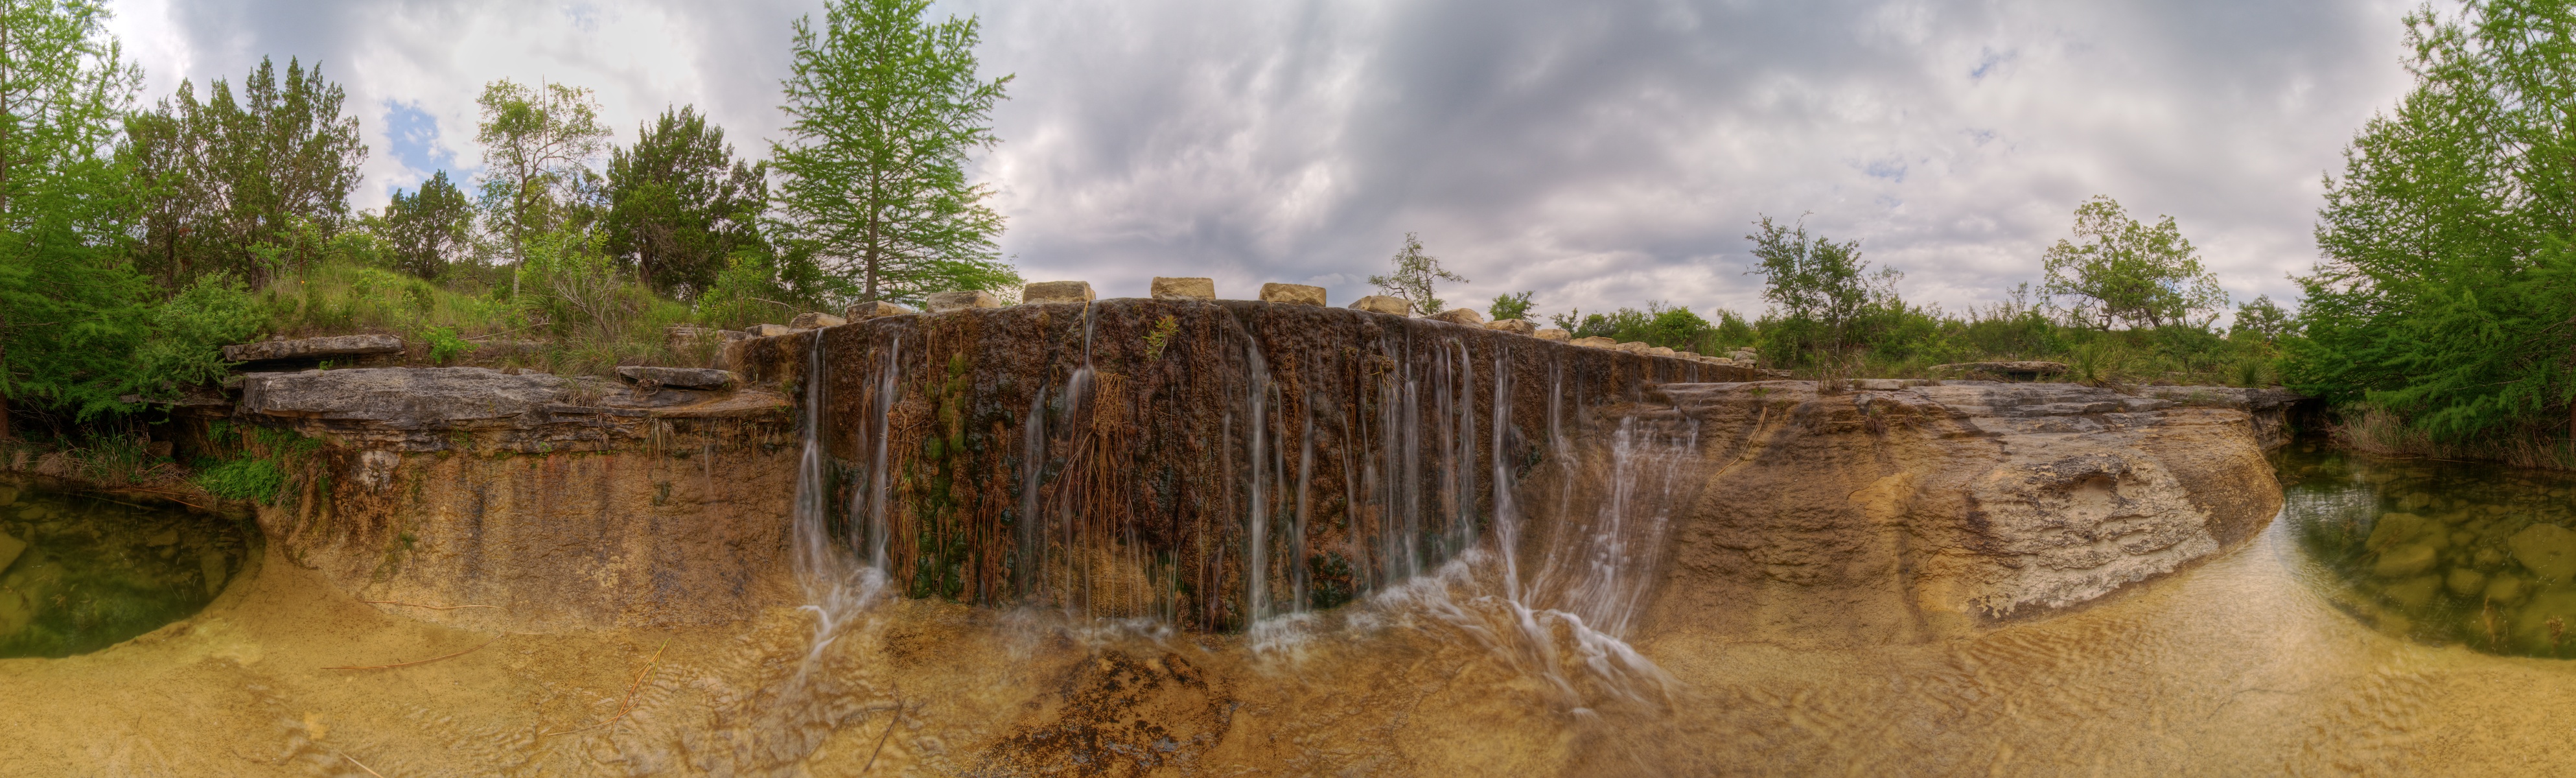
Above is the dam on the Bromfield Trail, as seen from the foot of the dam, with the outflow channel split between the left and right edges of the image. You can see the stepping stones David refers to along the top of the dam. Plenty of water was flowing, but nothing compared to the flow Hermine produced – 3⅓ years later I’d’ve been standing in around six feet, or more, of torrential flow. (This panorama can also be seen in my preferred composition, with the dam split and the outflow channel centered.)
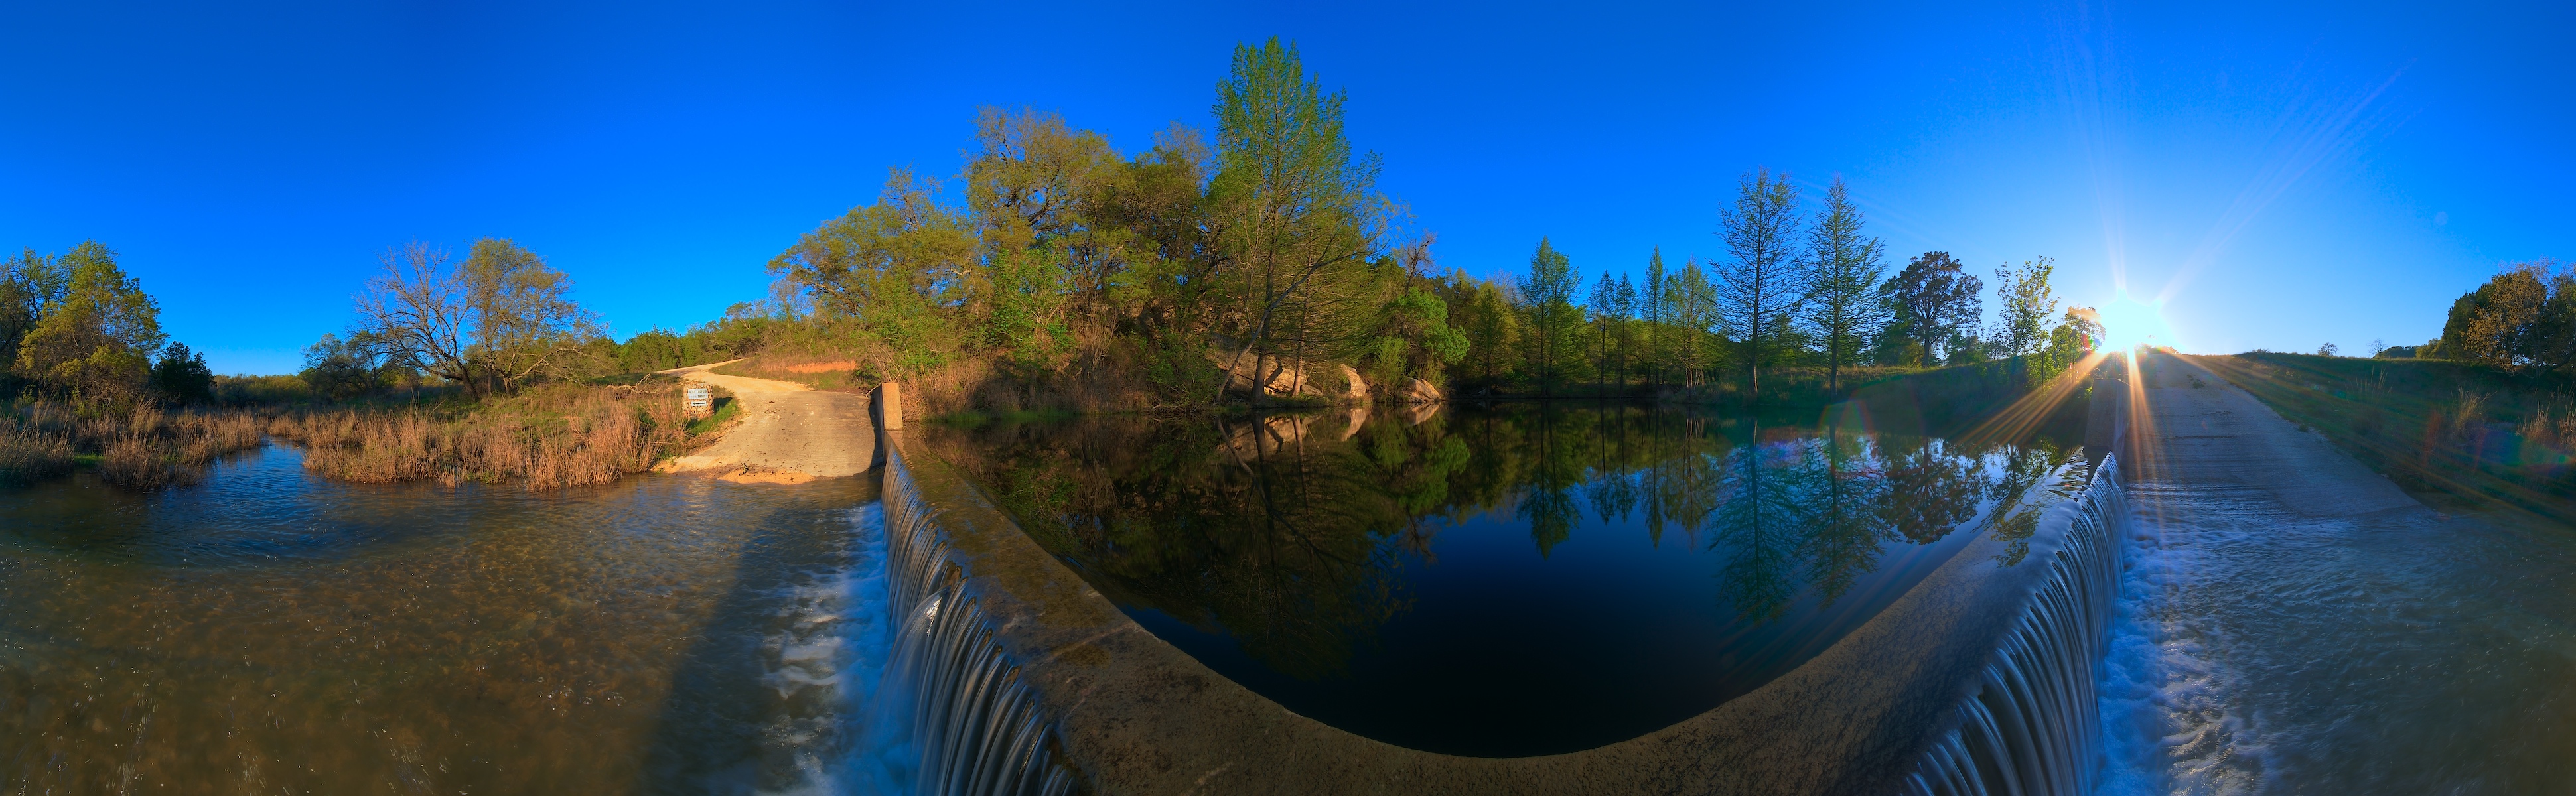
The panorama above shows the area identified by David as the “low water crossing leading to the Aldo Leopold Trail.” The most significant element is the dam that forms one end of the Jacob’s Ladder tank. In David’s photo, that’s seen on the right side of the image. In this panorama, which was shot at roughly the middle of the dam, it’s the curving central feature of the piece. At the time I shot that panorama, I was standing in something like 10 inches of lightly roiling water – an exceptional flow in its own right, which had turned the grassy areas above the stream banks (seen on the left side of the image) into a marsh. In David’s photo it would be more like 2½ or 3 feet of knock-you-off-your-feet water, and those grassy areas are completely underwater.
A photographic aside: While the Jacob’s Ladder dam is straight, my panorama is not wrong to portray it curved. If you were to stand in the same place and look at the dam, the image of the dam falling on your retinas would also be curving away into the distance. You can understand the basis of this effect by drawing an overhead diagram with yourself as a point and the dam as a straight line. Now draw straight sight-lines from the point, representing one of your eyes, to various locations along the length of the dam’s straight line. Those are just some of your many lines-of-sight in the scene. The diagram makes it obvious that the sight lines to the portions of the dam furthest from you are the longest, and that they shorten as they approach the portion of the dam directly in front of you. The differences in length among the sight-lines increases as the point is moved closer to the line representing the dam, and therefore the closer you are to the dam, the more pronounced is the effect of perspective. (In this case, I was standing very, very close to the dam – as close as the legs of my tripod would permit.) As you know from everyday experience, objects appear smaller as the distance to them increases, so it follows that the portion of the dam directly in front of you will appear more-or-less “full size,” while the more distant parts will appear smaller. Because the effect is continuous (rather than discrete, as in the case of the lines in our diagram), a smooth curve of decreasing apparent size results. (More formally speaking, the portions of the dam subtend progressively smaller angles on your retina as the distance to them increases.) It’s our brains that straighten-out our perception of the lines. (That straightening is generally useful, but is also the cause of certain optical illusions. So, our brains’ attempts to “correct” our perceptions sometimes distorts them instead. Thus, there is no free lunch in perception.) In our cameras, unless we’re shooting with fisheye lenses, special optical elements in the lenses perform the same rectilinear correction (sometimes adding extra chromatic aberration in the process). In order to assemble a panorama, the panorama stitching software must undo the rectilinear correction in the lens, thereby restoring the true perspective of the images and allowing the common features in the images, especially those furthest from the center of the images, to naturally align with one another (assuming the panorama is photographed without mistakes like parallax errors). Thus the “straight” lines in the image return to their original perspetive-bent appearances.
In panoramas representing a field-of-view of 180°, or less, it is possible to subsequently restore the rectilinear correction, as was done in my recent panorama of the U.T. Austin Main Building and Tower. Note, however, that elements near the edges may have an increasingly implausible appearance of their own in such corrected images. They appear implausible to us, because our eyes can’t show us comparable fields-of-view, and therefore we are not accustomed to that degree of rectilinear correction.


